Lesson 5: The Ocean (Water Cycle)
The Water Cycle
Objectives:
- The students will be able to explain the water cycle process.
- The students will be able to demonstrate and explain evaporation and condensation.
Background Information for Students and Teachers:
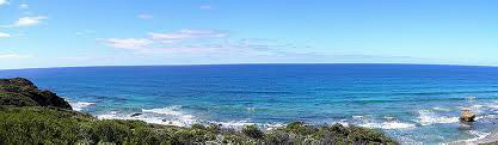
There is no other planet in the entire solar system like Earth. It holds nearly all the liquid water in our solar system! It is this water that allowed life to come into being and spread throughout our planet. These unique oceans exist because the planet's surface temperature is in the range in which water remains liquid. The temperature range, 32 to 200 degrees, occurs rarely in our universe; matter tends to be frozen solids or hot gases. By looking at a map or globe, one can see that all the oceans are interconnected, and are divided by the continents. The northern parts of the Atlantic and Pacific Oceans which go around the North Pole, form the Arctic Ocean. The southern parts of the Atlantic, Pacific and the Indian Oceans extend around the Antarctic Continent and form the Antarctic Ocean. These five great oceans cover approximately 70% of the surface of the earth.
Many scientists believe that the oceans holds the key to how the earth was formed. One important factor is related to erosion, and the other to the difference in the crust of the earth under land to under the ocean.
Throughout the years, land areas on earth have been changed and worn away by the forces of erosion. If the ocean floor is not as affected by erosion from the wind and water, then it may be closer to its original state. This then, will allow studies to confirm or correct our knowledge of how the earth was formed.
The crust of the earth is thinner under the floor of the ocean than under land areas. It is thought that it would be easier to reach the layer beneath the crust, the mantle, through the ocean floor, though as of this time it is still impossible. This will allow scientists to learn more then they now know about the earth and its origin.
Materials:
Enough of the following for students to work in pairs;
Clear colored jars or bottles with a small neck
Ice cubes
Hot water
An overhead transparency of the following page, The Water Cycle. Be sure to color the drawing in after you've made the copy.
Sufficient copies of the Water Cycle Flow Chart
The Experiment Form
Two Ocean foldables - one with a world map with oceans outlined and one "The Oceans" booklet.
Narrative:
Intro: Have students fold their foldables. Have them fill out the first two pages of "The Ocean" foldable.
Procedure:
Scientists believe that while some water was originally on earth, more came from water vapor in the atmosphere, and from water in rocks that was released during the earth's formation. Rainwater was released from clouds in the atmosphere (what we refer to as part of the water cycle). As the earth cooled, more water came up from volcanoes, hot springs, and other sources. Gradually our oceans were filled.
Show the overhead transparency on the following page titled, The Water Cycle. Go over the four steps with the students. If the students have no questions at the end of the explanation, shut the overhead off and give each student a copy of the hand out on the following page, A Water Cycle Flow Chart. Read the directions to them and have them fill it in correctly.
Directions: The steps that are on the Flow Chart are listed out of order. You are to rewrite them on the chart in the correct order. After allowing sufficient time, correct the flow charts together if you do not wish to collect them.
Explain to the students the experiment they are about to do will (should) allow them to see evaporation and condensation. Have them work in groups of two, and remind them to record their observations on the Experiment Form.
Directions:
1. Place a small amount of hot water in the bottle or jar.
2. Place an ice cube over the top of the bottle (in the neck) so it won't fall in.
3. Write down your observations.
Assessment:
Discuss and explain what happened. Explanation: After the ice cube was on the jar a while, they should have been able to see a cloud near the top of the bottle. Water vapor was in the bottle because the warm water inside was evaporating. Water vapor is warm and the air near the ice cube is cool. When the water vapor meets the cool air near the ice cube, it starts to condense. It changes back to tiny droplets of water. The water droplets make the cloud that you see. If the water droplets get big enough, some of them might fall to the bottom of the bottle.
Differentiation Suggestion for advanced groups - or for extra credit (as homework):
Ask the students to come up with a simple experiment that shows evaporation and condensation. (NOTE: It could simply be a glass of water set out on the table. The students should measure the water first, and again in a few days to show evaporation.) An experiment form must be filled out. Results could be shared orally with their peers.
References: http://www.yale.edu/ynhti/curriculum/units/1994/5/94.05.08.x.html
Foldables: http://members.abcteach.com/search.php?q=ocean+foldable
